How to Post a Job on IHSS Connect and Send It to a Caregiver

Posting a job on IHSS Connect lets caregivers near you see what you need and apply. You can also send your post straight to a caregiver whose profile you like. It is free, and it works on a phone or a computer.

This guide walks through every screen. We posted a sample job for a child with cerebral palsy who uses a G-tube, then sent it to a test caregiver account, and took screenshots on both a phone and a computer along the way.

Flag

Screens can change

These screenshots were taken in 2026 with an IHSS Connect test account. The site gets updates, so a button or label may look a little different when you post.

Before you start

You need to be signed in to a free IHSS Connect account for a recipient or family. Job posts are made from that kind of account, and account types can’t be switched after sign-up. Have these ready:

Have these ready

  • A first name or nickname for the person getting care
  • The city where care will happen
  • A start date
  • The days and hours you need help
  • The tasks and any skills that help (for example, transfers or G-tube feedings)
  • Anything you require, like a driver’s license
  • A photo of the care setting, if you want to add one (optional)

Worth knowing

What IHSS Connect does, and what happens outside it

IHSS Connect is free. It helps families and caregivers find and message each other. Hiring decisions and pay happen outside the site, through your program, such as IHSS, WPCS, or respite.

IHSS Connect will never message you asking for a Social Security number, a password, or bank details.

Part 1: Post your job

After you open the form, posting takes seven short screens. Every step below has a phone view and a computer view. Tap the switch above each picture to change views.

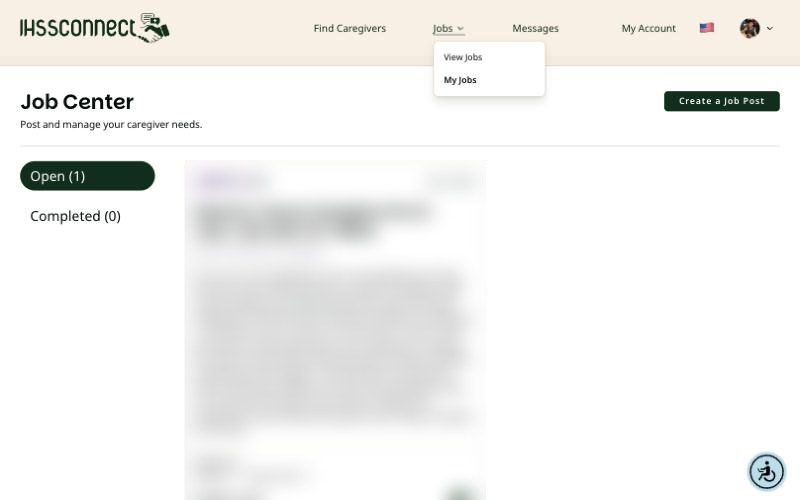
Step 1: Open Jobs, then My Jobs

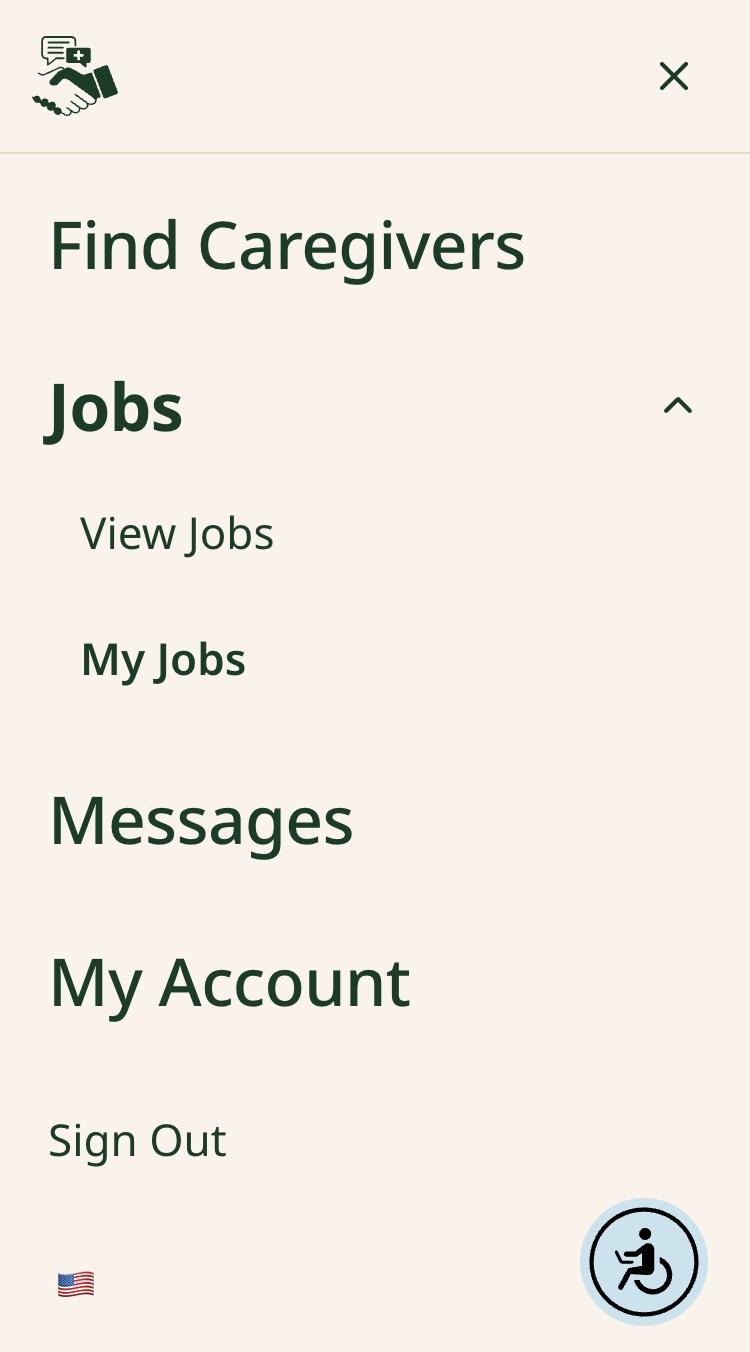
On a phone, tap the menu icon (three lines) in the top-left corner, tap Jobs, then tap My Jobs. On a computer, open the Jobs menu in the top bar and click My Jobs.

This opens your Job Center, where your open and completed job posts live.

Step 1 of 16

IHSS Connect phone menu with Jobs expanded, showing View Jobs and My Jobs
IHSS Connect desktop Jobs menu open, showing View Jobs and My Jobs above the Job Center

Jobs → My Jobs opens your Job Center.

Step 2: Tap Create a Job Post


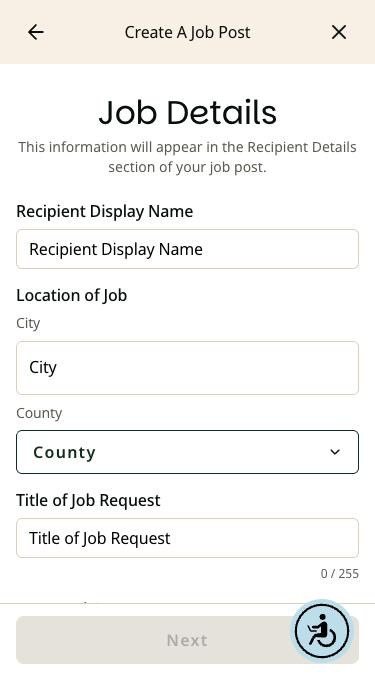
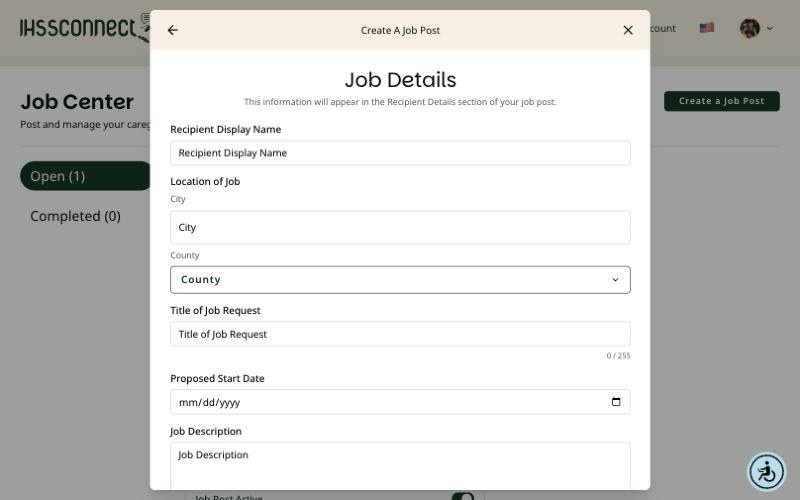
The Create a Job Post button sits at the top of the Job Center (top right on a computer). Tap it, and a short form called Job Details opens.

Step 2 of 16

Blank Job Details form on a phone with fields for Recipient Display Name, City, County, and Title
Blank Job Details form on a computer with fields for name, city, county, title, start date, and description

The Job Details form, before anything is filled in.

Step 3: Fill in the job details

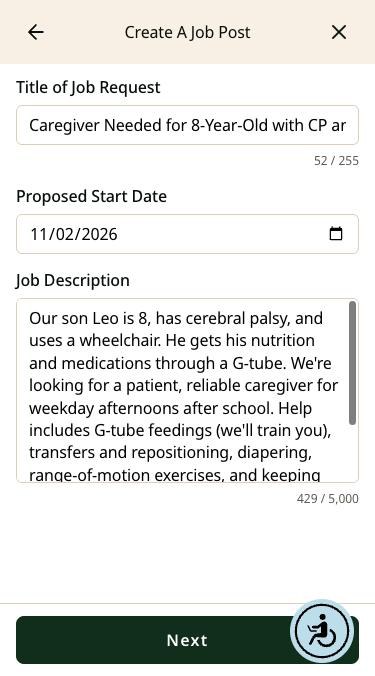
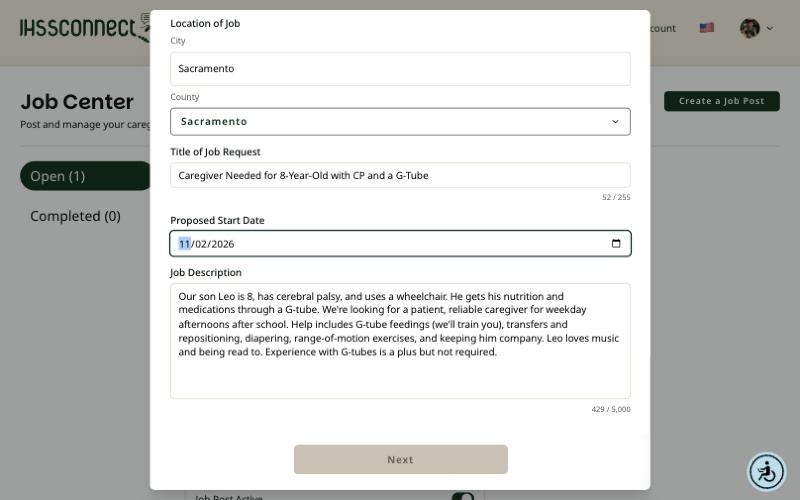
  • Recipient Display Name — the name caregivers will see. A first name or nickname is enough.
  • City — start typing and pick your city from the list. The County fills in on its own.
  • Title of Job Request — up to 255 characters. Say who needs care and the main need, like “Caregiver Needed for 8-Year-Old with CP and a G-Tube.”
  • Proposed Start Date — when you would like help to begin.
  • Job Description — up to 5,000 characters. Describe the tasks, the schedule, any skills that help, and what makes someone a good fit.


Tap Next when you are done.

Step 3 of 16

Job Details form on a phone filled in with a title, a start date of 11/02/2026, and a description
Job Details form on a computer filled in with Sacramento, a job title, start date, and description

Our sample post. “Leo” is a made-up example, not a real child.

Worth knowing

Keep identifying details out of your post

Caregivers looking for work can read your post. Share enough for them to know the job: the main tasks, the schedule, and the skills that help.

Leave out last names, your street address, birthdates, and Medi-Cal or Social Security numbers. You can share more privately once you are talking with a caregiver.

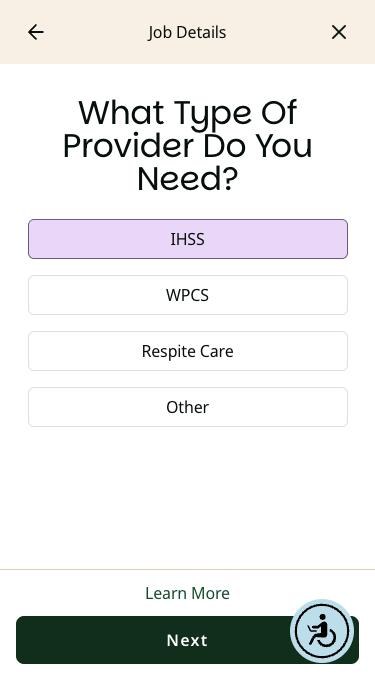
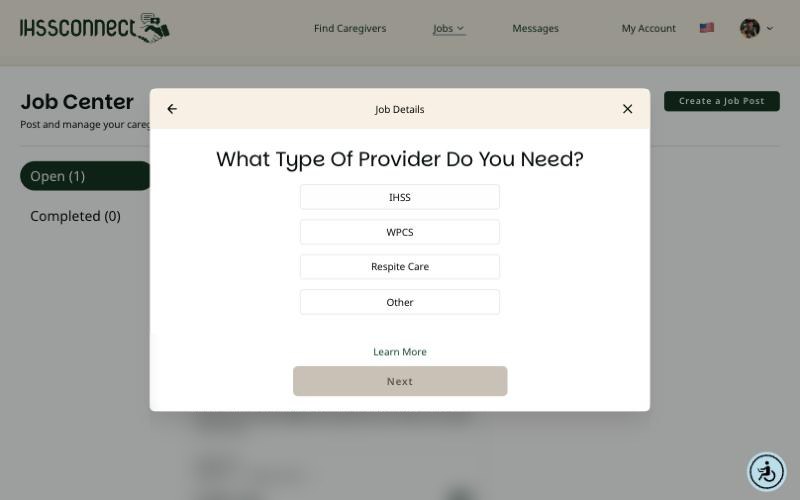
Step 4: Choose the type of provider

Pick the program the caregiver would work under: IHSS, WPCS, Respite Care, or Other. The Learn More link on this screen explains each one. Tap Next.

Step 4 of 16

What Type Of Provider Do You Need screen on a phone with IHSS selected
What Type Of Provider Do You Need screen on a computer with IHSS, WPCS, Respite Care, and Other

We chose IHSS for the sample post.

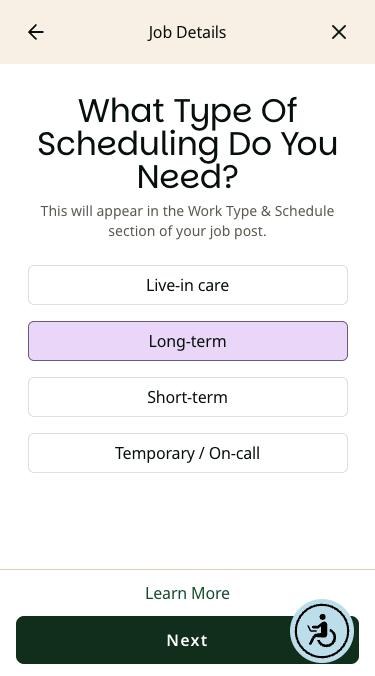
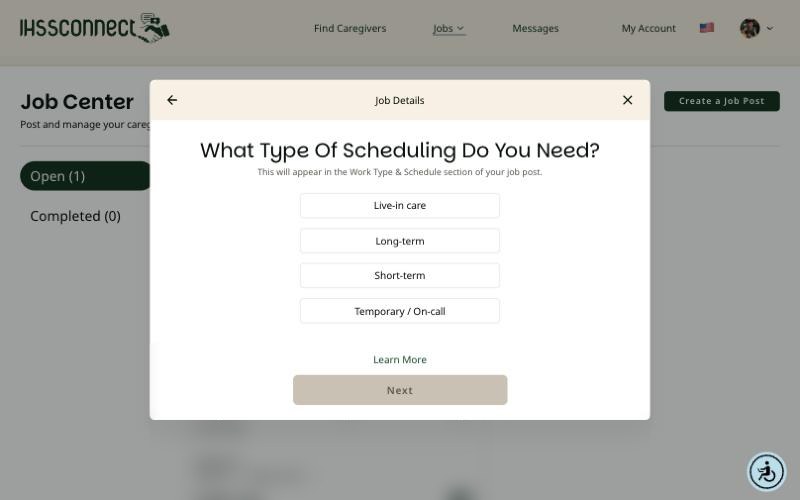
Step 5: Choose the type of schedule

Pick Live-in care, Long-term, Short-term, or Temporary / On-call. This shows in the Work Type & Schedule section of your post. Tap Next.

Step 5 of 16

What Type Of Scheduling Do You Need screen on a phone with Long-term selected
What Type Of Scheduling Do You Need screen on a computer listing Live-in care, Long-term, Short-term, and Temporary or On-call

Long-term fits a regular weekly job.

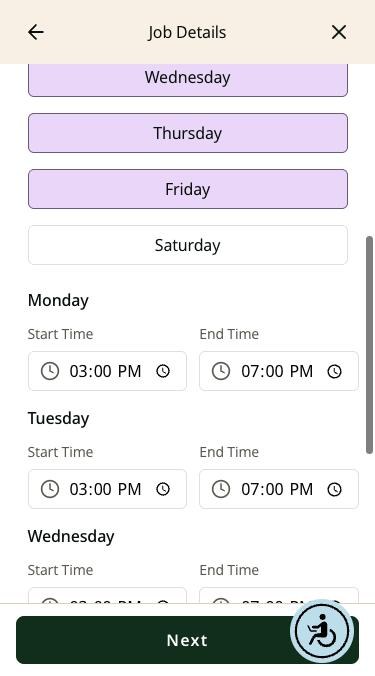
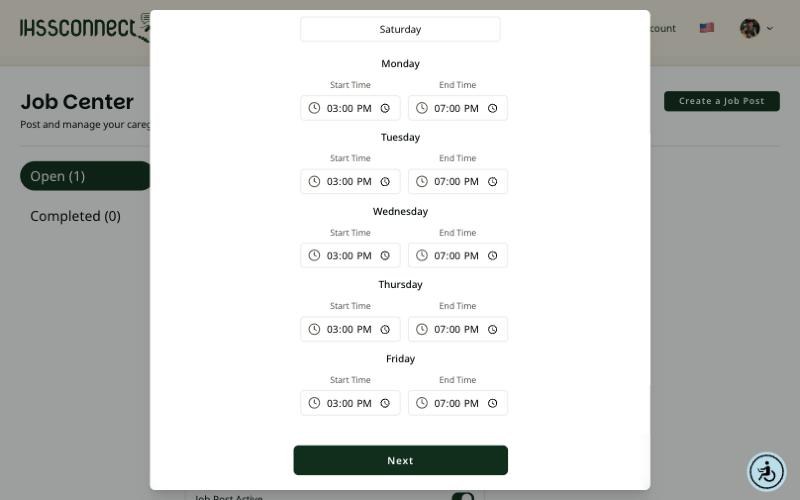
Step 6: Set the days and hours

Select every day you need help, or choose No Preference. A start time and an end time appear for each day you select.

The times start out at 9:00 AM to 5:00 PM, so change them to your real hours. Our sample uses Monday through Friday, 3:00 PM to 7:00 PM. Tap Next.

Step 6 of 16

Job Schedule screen on a phone with weekdays selected and 3:00 PM to 7:00 PM start and end times
Job Schedule screen on a computer showing start and end times of 3:00 PM to 7:00 PM for Monday through Friday

Check the times: they default to 9 to 5.

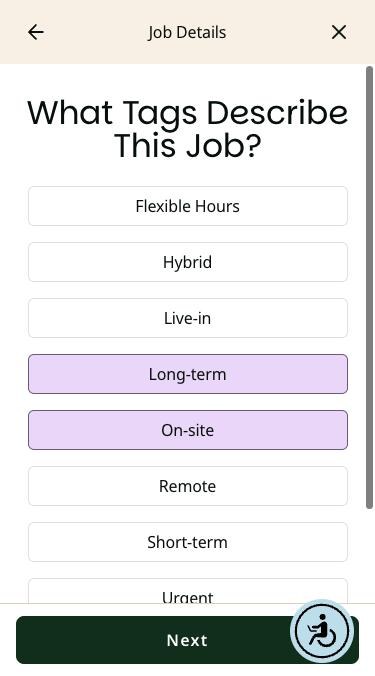
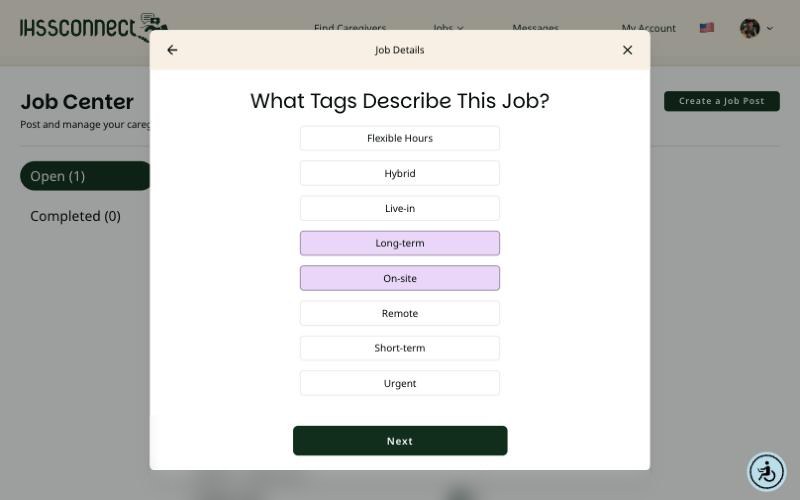
Step 7: Pick tags that describe the job

Choose any that fit: Flexible Hours, Hybrid, Live-in, Long-term, On-site, Remote, Short-term, or Urgent. You can pick more than one. Tap Next.

Step 7 of 16

What Tags Describe This Job screen on a phone with Long-term and On-site selected
What Tags Describe This Job screen on a computer with Long-term and On-site selected

We picked Long-term and On-site.

Step 8: Tell caregivers what you require

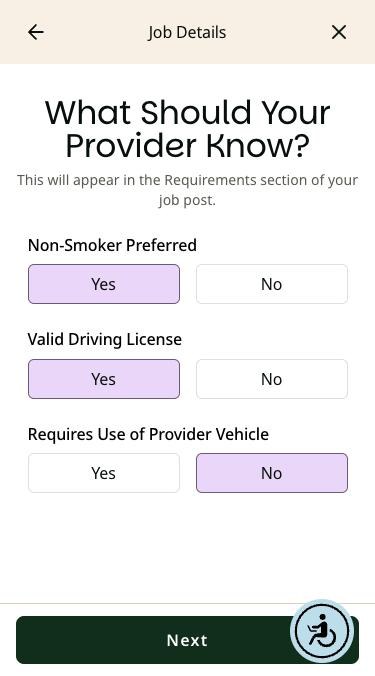
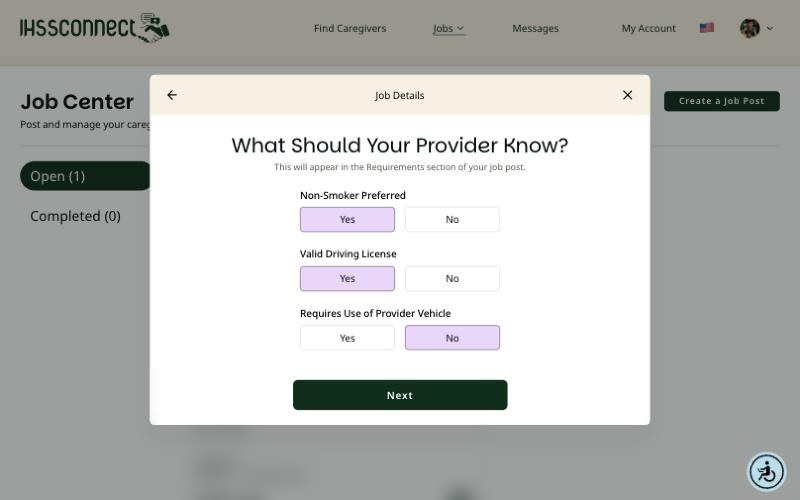
Answer Yes or No for Non-Smoker Preferred, Valid Driving License, and Requires Use of Provider Vehicle. These show in the Requirements section of your post.

The Next button works without answering these, as they are optional. Answering them helps caregivers decide quickly whether the job fits them.

Step 8 of 16

What Should Your Provider Know screen on a phone with Yes, Yes, and No selected
What Should Your Provider Know screen on a computer with answers for non-smoker, driving license, and provider vehicle

Three quick yes-or-no questions.

Step 9: Add a photo if you want, then tap Finish

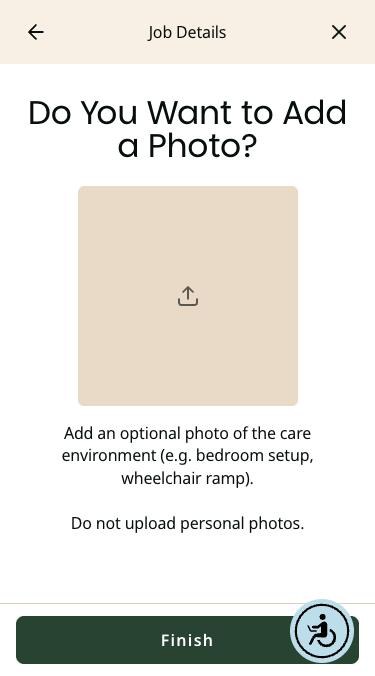
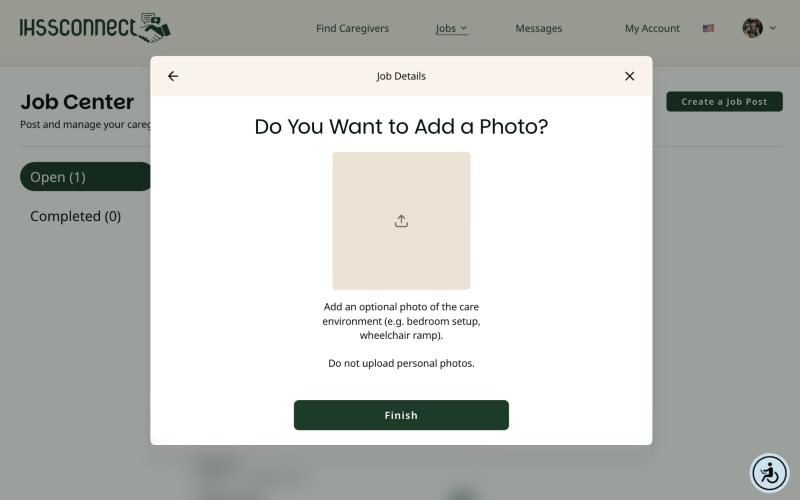
You can add a photo of the care setting, like a bedroom setup or a wheelchair ramp. The screen asks you not to upload personal photos. A photo is optional.

Tap Finish to publish your post.

Step 9 of 16

Do You Want to Add a Photo screen on a phone with an upload box and a Finish button
Do You Want to Add a Photo screen on a computer with an upload box and a Finish button

Photos are optional. Leave out faces and personal photos.

Step 10: Check that your post is live

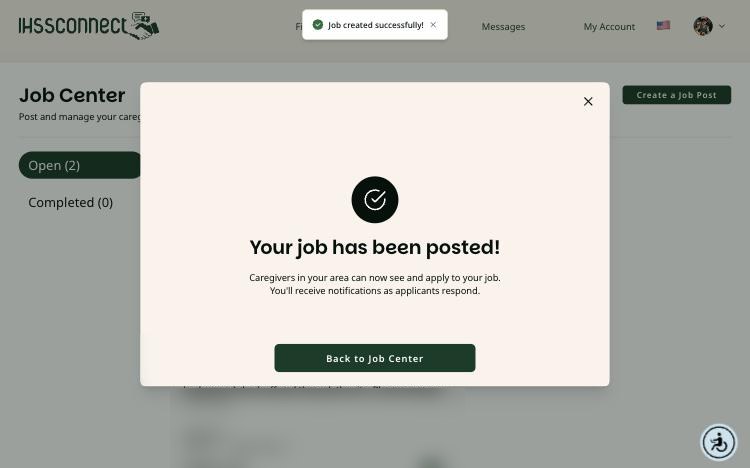
A message confirms that your job has been posted. It says caregivers in your area can now see your job and apply, and that you will get notifications as applicants respond.

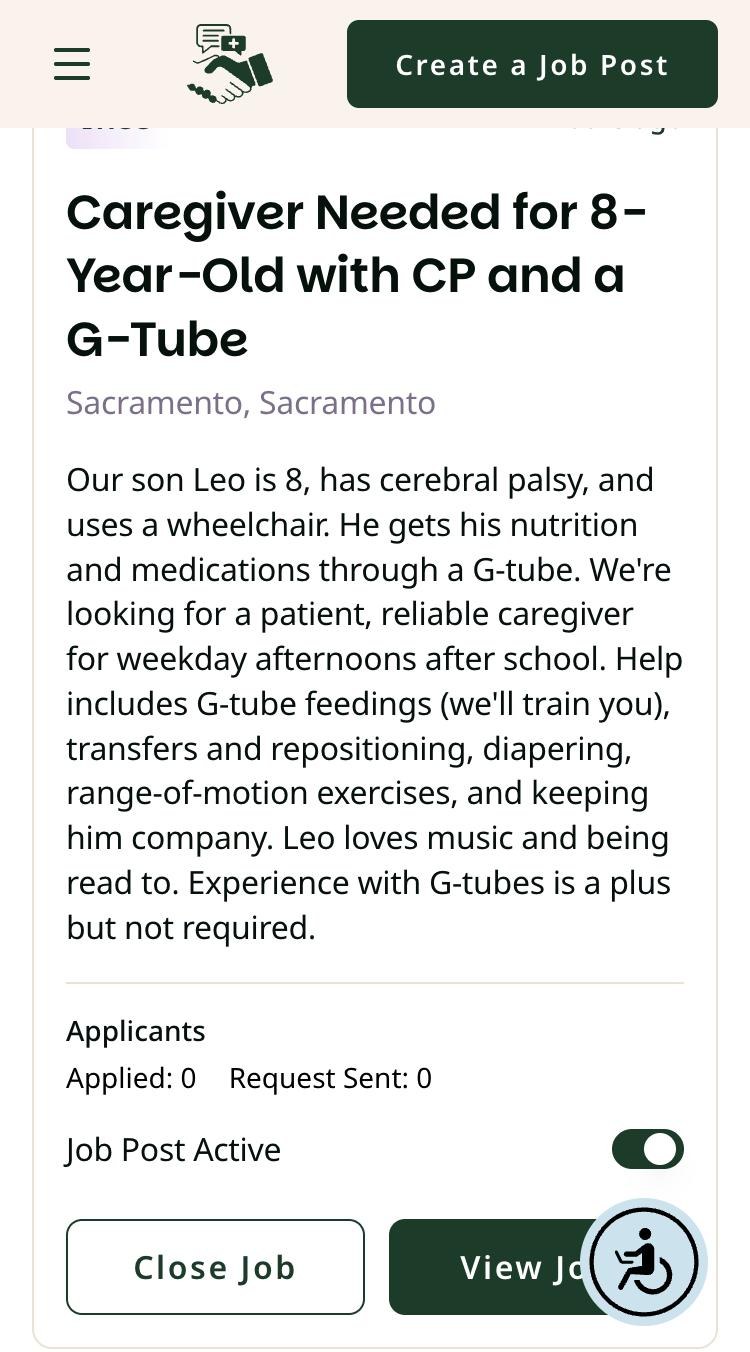
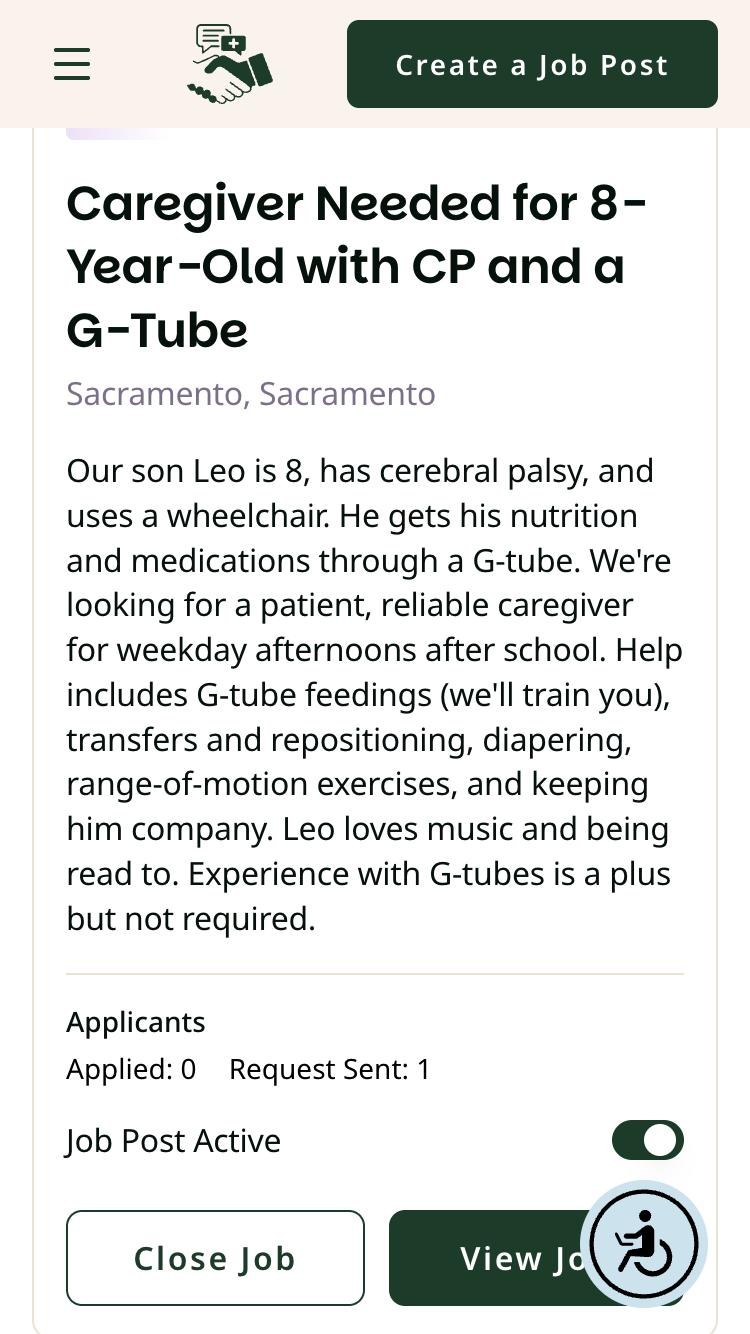
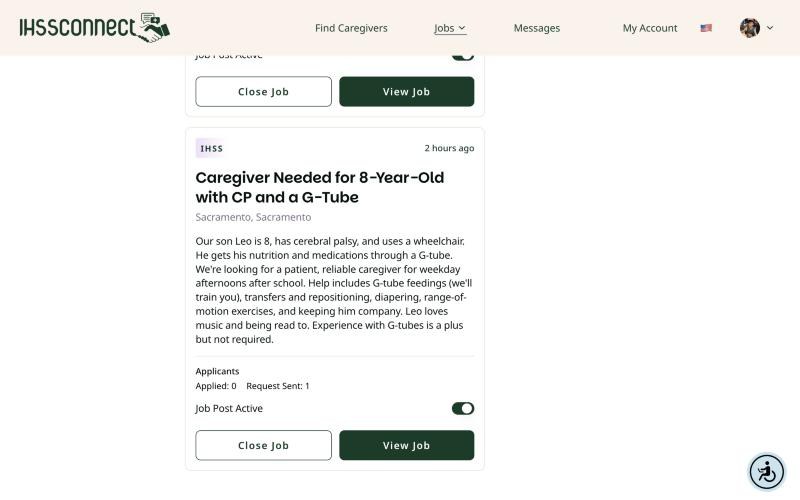
Back in your Job Center, your new post appears as a card. It shows the program, title, location, and description, plus an Applicants line with two counts: Applied and Request Sent. You will also see a Job Post Active switch and the Close Job and View Job buttons.

Step 10 of 16

New job card in the Job Center on a phone showing Applied 0, Request Sent 0, and Job Post Active
Your job has been posted confirmation message on a computer with a Back to Job Center button

Phone view: the new job card. Computer view: the confirmation message.

Part 2: Send your job to a caregiver you found

Caregivers can find and apply to your post on their own. If you already found someone you like, you can also send the job straight to them.

Step 11: Find the caregiver

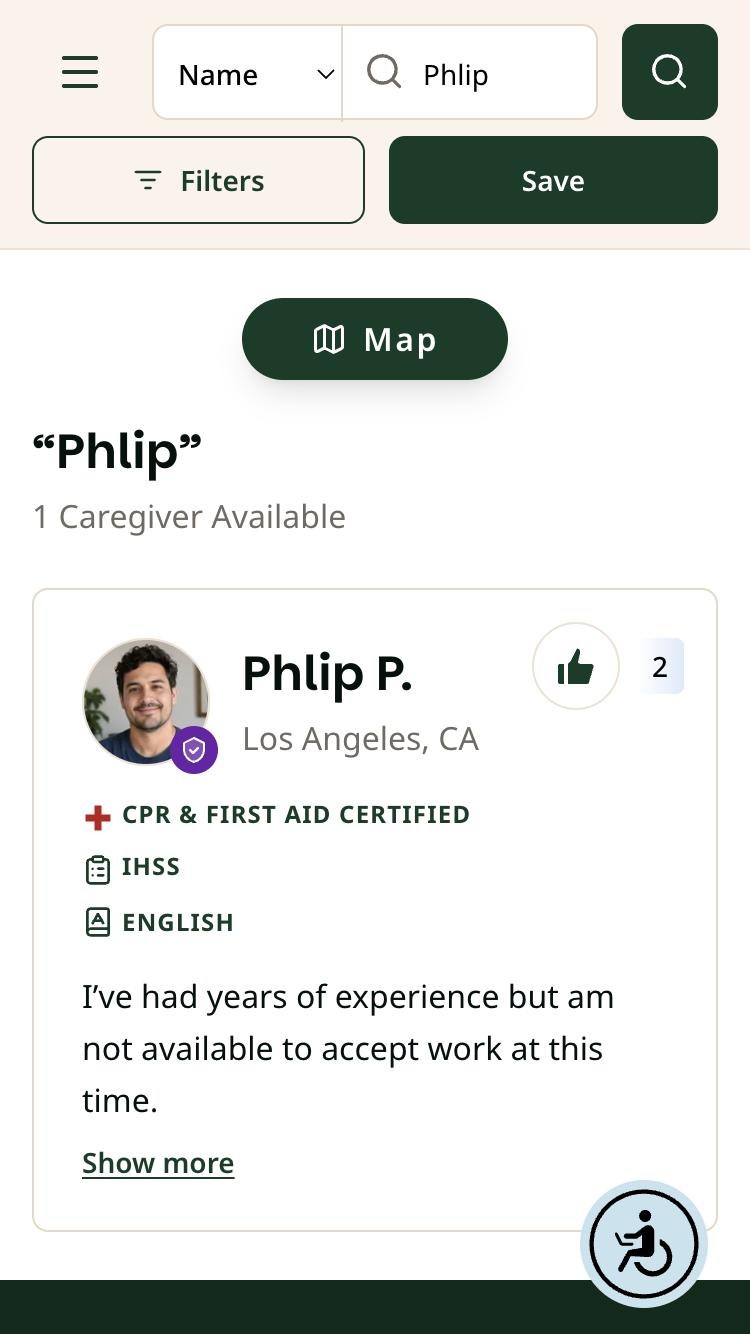
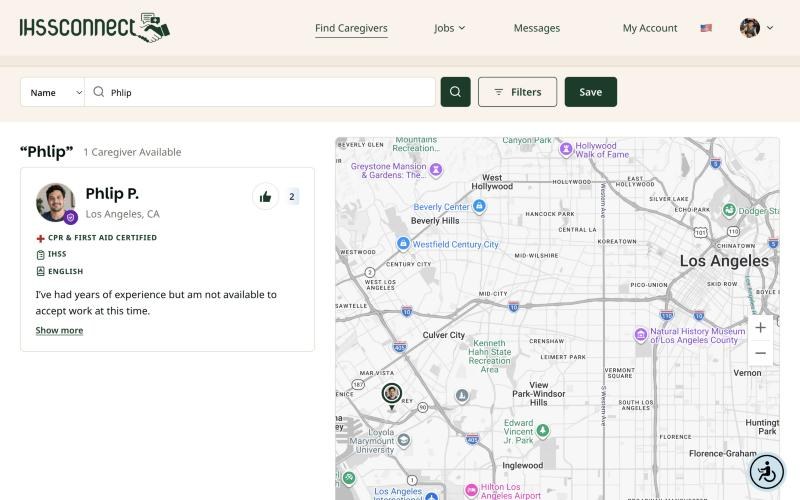
Go to Find Caregivers. In the search bar, change the drop-down from Location to Name, type the caregiver’s first name, and tap the search button if you know a specific caregiver.

You can also search by city, county, or ZIP code. A caregiver who has set their profile to not available will not show up in search.

Step 11 of 16

Find Caregivers on a phone with Name search for Phlip showing one result, Phlip P. in Los Angeles
Find Caregivers on a computer with Name search for Phlip showing one result next to a map

Searching by first name. Phlip P. is our test caregiver account.

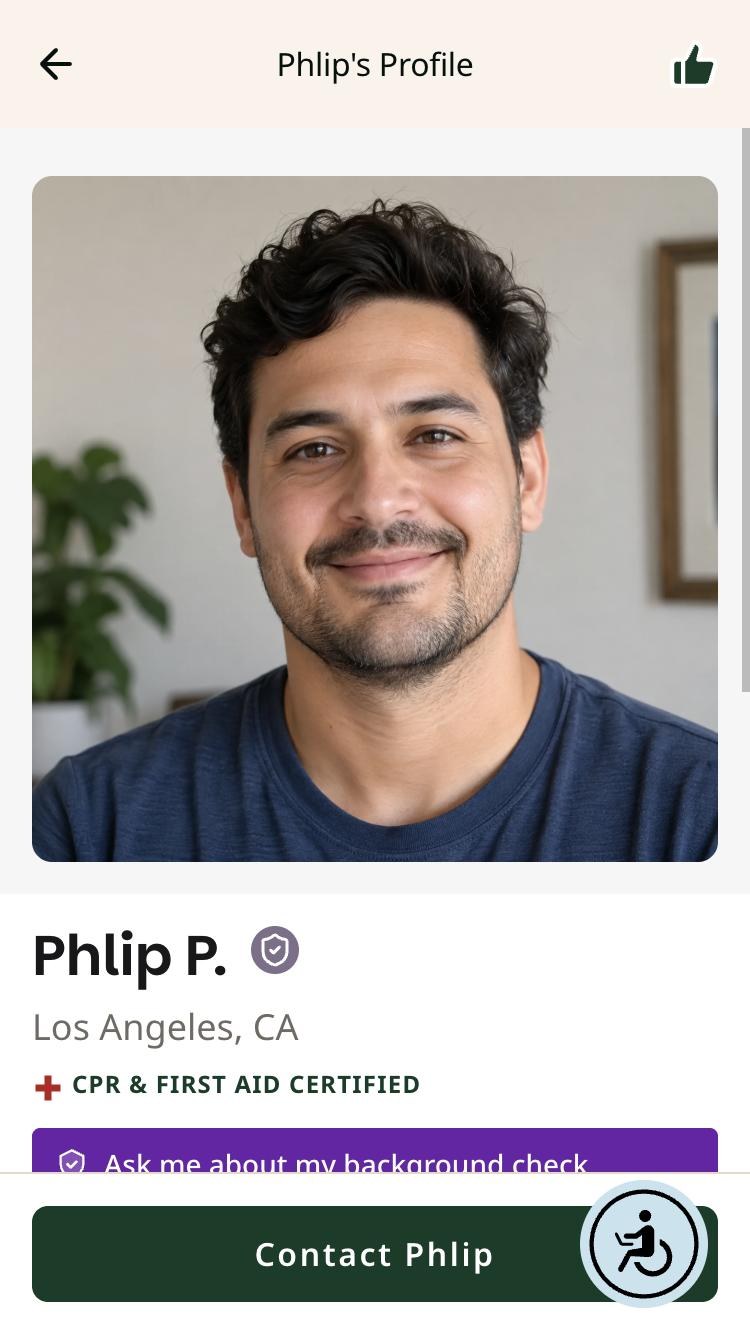
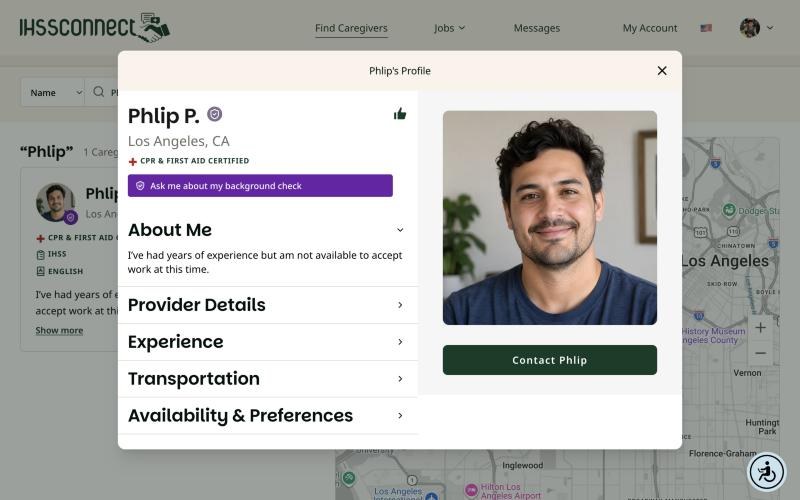
Step 12: Open the profile and tap Contact

Tap the caregiver’s card to open their profile. Read About Me, Provider Details, Experience, Transportation, and Availability & Preferences.

When you are ready, tap Contact and the caregiver’s name. On a phone the button is at the bottom of the screen. On a computer it is under the profile photo.

Step 12 of 16

Caregiver profile for Phlip P. on a phone with a Contact Phlip button at the bottom
Caregiver profile for Phlip P. on a computer with profile sections and a Contact Phlip button

The Contact button starts a job request or a message.

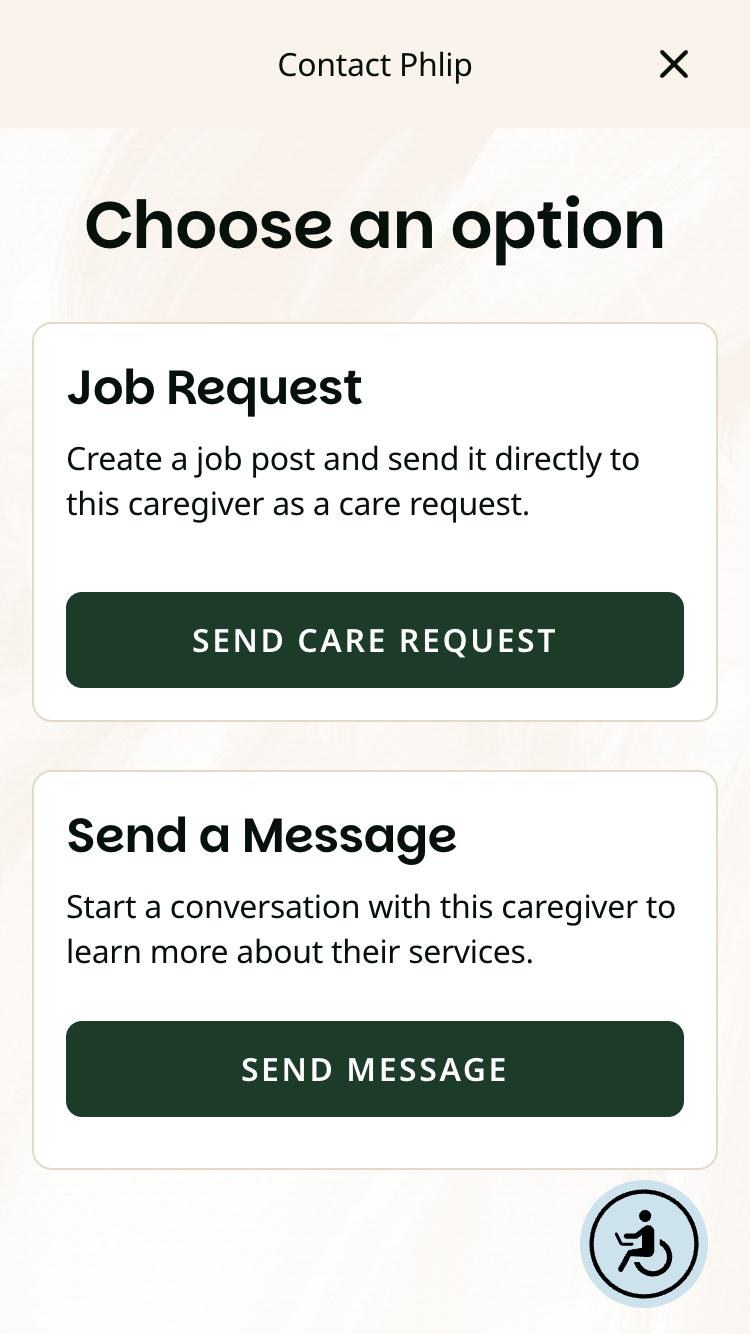
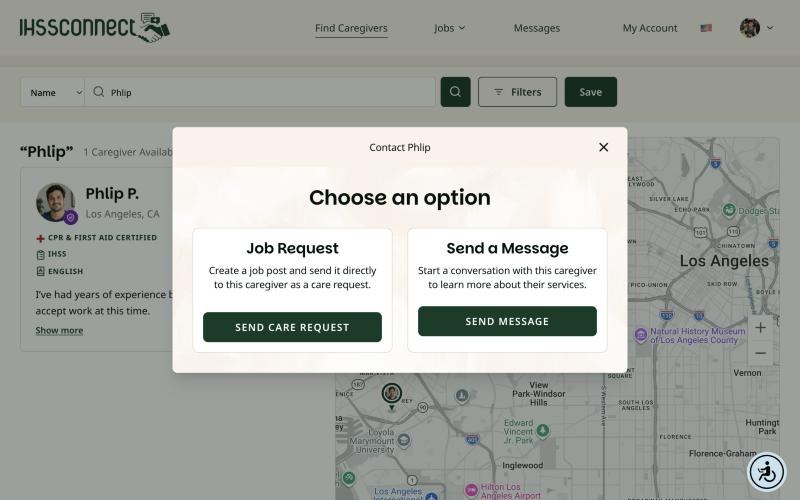
Step 13: Choose Send Care Request

You get two choices. Job Request sends one of your job posts straight to this caregiver as a care request. Send a Message starts a conversation without a job attached.

To send your job, tap Send Care Request.

Step 13 of 16

Choose an option screen on a phone with Job Request and Send a Message cards
Choose an option screen on a computer with Send Care Request and Send Message buttons

Job Request attaches your post; a message does not.

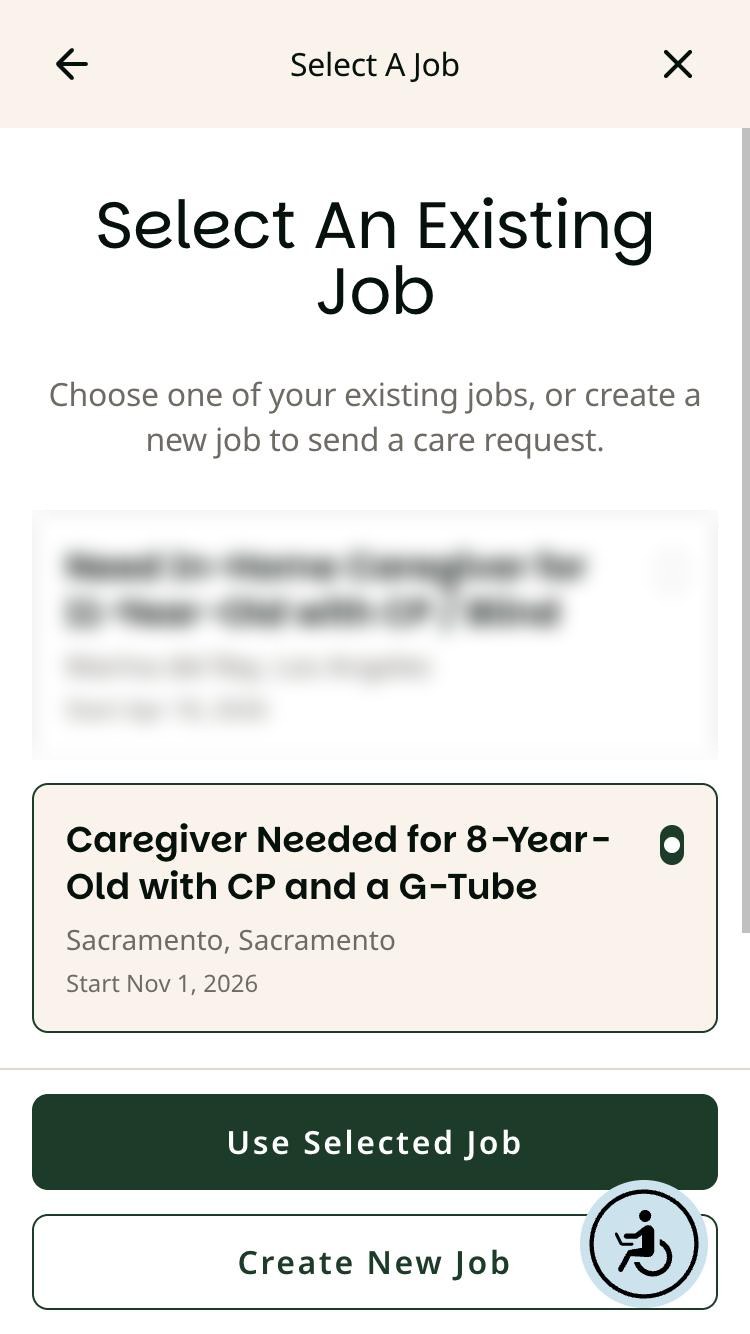
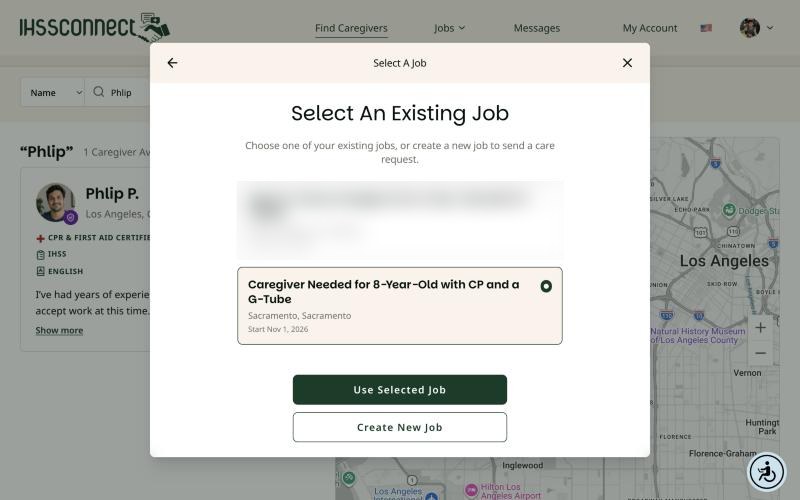
Step 14: Pick your job and tap Use Selected Job

Select the job post you want to send, then tap Use Selected Job. If you have not posted the job yet, tap Create New Job instead.

A message confirms that your care request has been sent. The caregiver gets your request and can answer you in Messages.

Step 14 of 16

Select An Existing Job screen on a phone with the sample job selected and a Use Selected Job button
Select An Existing Job screen on a computer with the sample job selected

Other job posts in our test account are blurred.

Part 3: Follow up

Step 15: Watch for replies in Messages

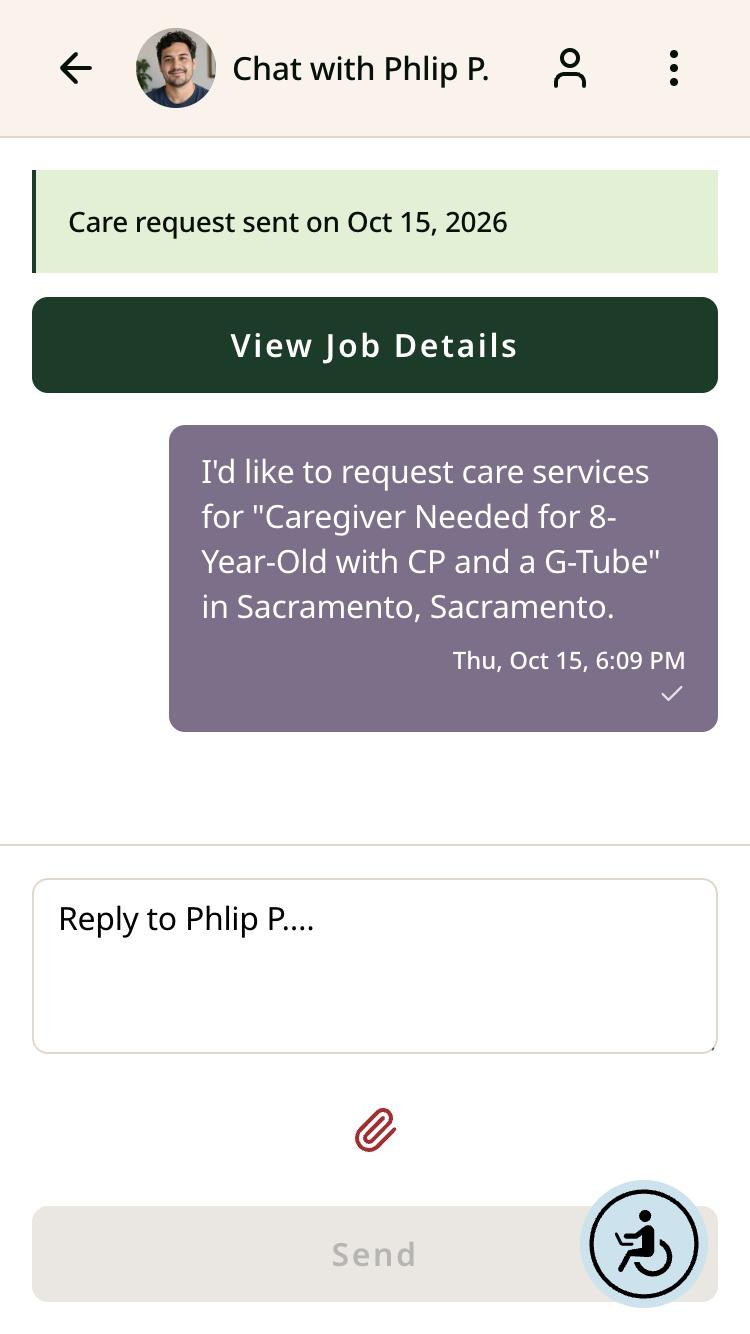
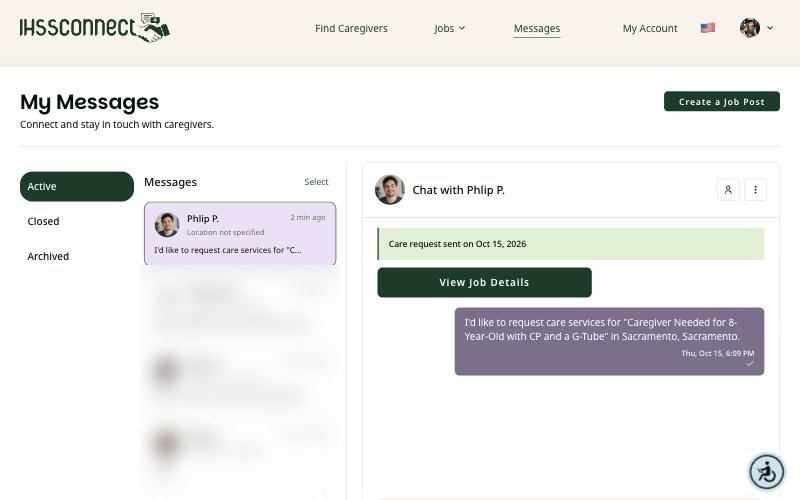
Open Messages. Your conversation with the caregiver starts with a note showing the date the care request was sent, a View Job Details button, and an automatic message naming your job and city.

Reply in the same conversation to set up a phone call or meeting.

Step 15 of 16

Chat with Phlip P. on a phone showing Care request sent on Oct 15, 2026 and a View Job Details button
My Messages on a computer showing the care request conversation with Phlip P.

Other conversations are blurred for privacy.

Step 16: Track your post in the Job Center

Your job card now shows Request Sent: 1. Applied counts caregivers who found your post and applied on their own. Request Sent counts caregivers you sent the job to.

Use the Job Post Active switch and the Close Job button to manage the post when you no longer need applicants.

Step 16 of 16

Job card on a phone showing Applied 0 and Request Sent 1
Job card on a computer showing Applied 0 and Request Sent 1 with Close Job and View Job buttons

Request Sent goes up each time you send this job to a caregiver.

After a caregiver says yes

IHSS Connect helps you find each other. Interviews, hiring, and schedules are worked out between you and the caregiver. Pay goes through your program, such as IHSS, WPCS, or respite, not through IHSS Connect.

For IHSS, the caregiver has to enroll with your county before IHSS can pay them. According to the California Department of Social Services (CDSS), that means attending a county provider orientation, turning in the Provider Enrollment Form (SOC 426) and the Provider Enrollment Agreement (SOC 846), and completing a fingerprint background check through the California Department of Justice. The county IHSS office or Public Authority runs this process.

For WPCS or respite, ask the agency that approved your hours what the caregiver needs to finish before they can start.

Worth knowing

G-tube feedings count as paramedical services in IHSS

IHSS treats G-tube feedings and stoma-site care as paramedical services. A licensed health care professional has to order them on the SOC 321 form before IHSS will authorize hours for them (Disability Rights California, March 2022).

If tube feeding is part of the job you are posting specifically for IHSS, ask your social worker whether a SOC 321 is on file.

Before anyone works in your home, read our Safety page for tips on interviews, references, and background checks.

Ready to post your job?

Posting is free. Sign in, open your Job Center, and tap Create a Job Post.

Sources

Sources

  1. CDSS — IHSS Provider Orientation ProcessCounty provider orientation, SOC 426, SOC 846, and the DOJ fingerprint background check.
  2. CDSS — SOC 847, Important Information for Prospective Providers (rev. 1/11)Providers must finish every enrollment step before they can be enrolled and paid.
  3. Disability Rights California — Paramedical Services through the IHSS Program (Mar. 1, 2022)G-tube feedings and stoma care are paramedical services that need a SOC 321 order.
  4. IHSS Connect — SafetySafety tips for meeting and hiring a caregiver.
  5. IHSS Connect — How to ConnectOverview of how families and caregivers use the site.
  6. IHSS Connect — Background CheckHow the optional caregiver background check works.

Every screen in this guide was captured on ihssconnect.com on October 15, 2026, using test accounts. CDSS is the authority on IHSS provider enrollment; contact your county IHSS office or Public Authority for your local process.

Share

Next Story

IHSS Portal Switches to One-Time Passcodes on October 24: What Providers and Recipients Need to Know

Starting October 24, 2026, the IHSS Electronic Services Portal (ESP) — the website at etimesheets.ihss.ca.gov where providers submit timesheets and...

A Sensory-Smart Halloween: Making Trick-or-Treating Work for Autistic and Neurodivergent Kids

Halloween asks a lot of a kid’s nervous system — scratchy costumes, strange faces, sudden noises, a whole neighborhood staying...

Routine Bed Bath: How It Differs From Bathing, Oral Hygiene, and Grooming

IHSS isn’t a blank check for caregiving. It covers specific services, and each one has its own rules for what...